


 Tel : +86-592-3926659
 Email : gilia@inthelaboratory.com

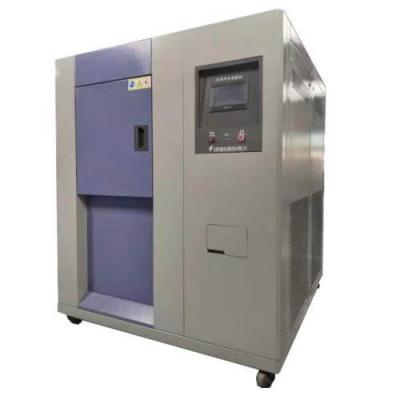
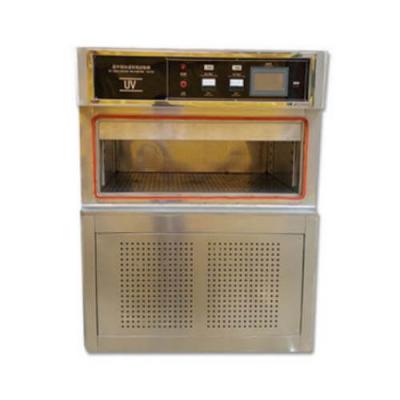
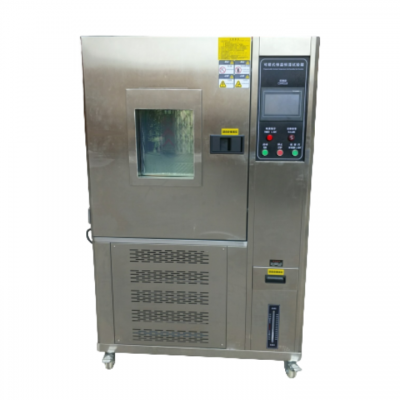
500C High Temperature Constant Temperature Test Chamber with Intelligent PID Temperature Control Instrument

I. Product overview
High-temperature test chamber is a necessary test equipment for aviation, automobile, home appliances, scientific research and other fields, which is used to test and determine the parameters and performance of electricians, electronics and other products and materials after the change of temperature environment for high temperature or constant test.
II. Product features
1. The product shell is made of cold rolled steel plate processing, surface electrostatic spraying.
2. The working chamber is made of high-quality 304 mirror stainless steel processing molding, four corners of the arc transition, double liner, beautiful appearance and atmosphere.
3. Equipped with 304 stainless steel handles, adjustable, stronger sealing.
4. Intelligent PID temperature control instrument, with timing, over-temperature alarm indication, temperature deviation correction, temperature control self-tuning and other functions.
5. Fully enclosed stainless steel heating tube with gas jacket heating method, high temperature fan circulation, so that the temperature is more uniform.
6. The sealing strip adopts aviation sealing material, high temperature resistance, up to 1000 ℃.
7. Air supply mode: fan forced circulation.
8. Thickened heat preservation, set the heat insulation layer inside.
9. Liquid crystal meter, program control meter, printer, 485 interface, U disk storage, SMS alarm and other functions can be added.
III. Table of technical parameters
|
Model No. Parameters |
GW-50BE |
GW-80BE |
GW-150BE |
GW-250BE |
GW-350BE |
|
Capacity |
50L |
80L |
150L |
250L |
350L |
|
Power supply |
220V 50HZ |
380V 50HZ |
|||
|
Temperature range |
50-500℃ |
||||
|
Temperature resolution |
0.1℃ |
||||
|
Temperature Fluctuation |
±1℃ |
||||
|
Wattage |
3000W |
3000W |
4500W |
6000W |
6500W |
|
Workshop dimensions (D×W×H)mm |
330×350×350 |
400×400×500 |
500×500×600 |
500×650×750 |
1000×440×800 |
|
Overall dimension (D×W×H)mm |
510×650×750 |
575×700×880 |
640×800×1040 |
640×950×1190 |
1190×770×1280 |
|
Package size (D×W×H)mm |
620×820×820 |
670×700×900 |
775×935×1180 |
775×1085×1330 |
1200×750×1130 |
|
Net/Gross KG |
58/68 |
80/94 |
102/121 |
135/156 |
160/190 |
Note: The above temperature and humidity parameters are measured at no-load temperature of 28℃ and humidity of 65%RH.
IV. Safety operation precautions
1. For the safety of the experiment, please install an external grounding device, select the power supply to match the equipment to install leakage protection devices.
2. Equipment is strictly prohibited for flammable and explosive, toxic, strong corrosive substances of the experiment.
3. Place the equipment on a dry platform, or on the ground, and keep > 50CM with the wall.
4. According to the need to place the experimental items in the tray above, turn on the power supply, open the switch, according to the intelligent meter operating instructions to set the desired temperature.
5. Turn off the power when the equipment is not in use and keep it dry and clean.
6. Please read the instructions carefully before operation.
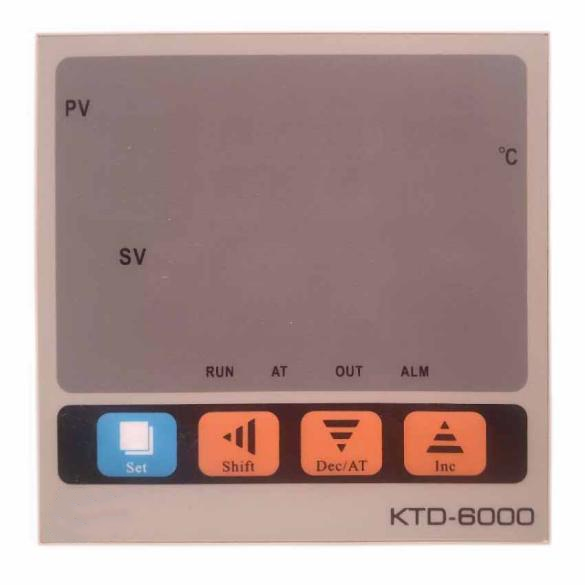
V. Controller operating instructions
Controller Operating Instructions
Panel Instruction
1. Operation and use
First of all, open the door to the need to test things inside, and then close the door to turn on the power to open the power switch and fan speed switch, according to the requirements of their own wind speed adjustment (no special requirements fan must be open), set the desired temperature and time can be normal operation, try not to open the machine door to prevent the machine from over-temperature when the machine is running.
2. The order of each function
(1) Temperature setting:
Open the machine's power switch, click the "SET" key, the upper row shows SP, this time for the set temperature, (temperature in the lower row of the controller shows) by clicking " " or "
 " key (The temperature is displayed in the lower row of the controller.) Then click the "SET" key, the upper row displays ST (the unit is minutes, this is the setting time, the controller is displayed in the lower row for the time), by clicking the "
 " or "
 " key, adjust the number in the lower row of the controller to the desired time, and then click the "SET" button, the controller returns to the standard mode. (General time set to 000, that is, do not set the time, do not set the time in the case of the machine to reach the set temperature has been to maintain a constant temperature, do not use the time directly off the power can be)
3. Detailed description of each function
(1) PV area display:
If " " is displayed, it means that the sensor is open or the input signal exceeds the upper limit of measurement; if "
 " is displayed, it means that the sensor is short-circuited or the input signal is lower than the lower limit of the range, when the input signal of the controller is not in the range, the buzzer will beep and the sound can be silenced by pressing any key.
(2) Time query:
When the controller is working in standard mode, just tap and press the 3shift key, the upper row will show the timing time, the lower row will show the controller setting time, press the 3key again, the controller returns to standard mode.
(3) Timing function:
When ST is set to 0, the controller cancel the timing function, the controller has been running; when ST is not set to 0, the controller has the timing function, when the controller's running time is up, the lower row displays END, the buzzer chirps, the controller stops working, press any key to mute the sound, and at the same time, press the5 key and 6key for 4 seconds to restart. Timing function starts when the RUN indicator flashes, no timing or timing has not yet started then RUN indicator long light, ALM light constant indicates a fault alarm.
4. Self-tuning function of the controller (set the setting time to 0, cancel the timing, and then set the timing time after the self-tuning ends)
If the temperature control effect is not ideal, please start the self-tuning function, press the  key 4 seconds after the AT indicator light flashes, the controller began to self-tuning, self-tuning after the end of the AT light stops flashing; at this time the control effect will be greatly improved.
In the process of self-tuning, press the  key 4 seconds after the operation indicator light long light, self-tuning will stop, the controller according to the original PID parameters for control.


 IPv6 network supported